This tutorial explains the contact features by using a tutorial to add a new contact. Your ministry should have a standard format for entering names and addresses.
This topic is available on video!
View > Video: Adding a New Contact
Adding/Editing a Contact
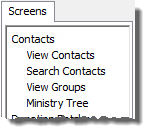
1.Select the <View Contacts> link.

2.Press the desired button at the top of the screen.


 Other ways to Add or Edit contacts
Adding Contacts
1.Press the <New Contact> button. 
2.Press the <New Contact> link. This link is found on the Name & Address Bar.

3.Press the <New> button. This button is in the New Contact screen, making it possible for you to add multiple new contacts without having to return to the main screens.

4.Select from the menu.
5.When entering a donation, you can add a new contact on the batch entry screen, or by pressing F6. Note: Because you cannot know if a donor is truly a new donor to your ministry, it is best to Search (F3) for a new contact before attempting to add the new contact. 
6.Press the <New Contact> button. 
This button is found in the Search Contacts box when searching for a contact to associate with a donation.
7.Import contacts from a text file. Read More > Import Contacts
Editing contacts
1.Click on the name in the Name & Address bar. 
2.Double-click on the address in the Name & Address bar. 
3.Press the <Edit Contact> button. 
4.Double-click in the yellow box on the Address Tab. 5.Press the <Edit> button. 
|
Any of these items will bring up the Contact box.

3.If the contact is an Organization, check the Organization box. When you do this, all of the personal name boxes will disappear, and only the Organization Name box will remain. When the contact is an organization, the default address and phone are Business instead of Home.

Organization Contacts
Organizations of many different types may be in the Contact list.
Types of organizations:
•Your own ministry (the "Me" contact) •Departments or ministries within your ministry (as designations receiving donations or locations that receive reports) •International offices of your ministry •Churches or businesses that support your ministry The software defines organizations information differently from individuals (people contacts), and it is important to understand these subtle differences.
How organization contacts are different from people contacts
On the New Contact screen, the name fields are replaced with just an Organization Name field. The <Organization> check box is checked.

If personal name information is entered before the <Organization> check box is checked, that personal information will be deleted once you save the contact.
Preferred Address defaults to Business instead of Home. (Note: If the contact was saved with personal information, the default address will remain as Home.)

Personal Info Tab
Two fields change depending on the contact type. For an individual they are Gender and Marital Status. For an organization they are Org Type (a free-form entry field) and Contact Person.


Designation Lookup
The Organization checkbox (true/false) is also used when looking up designations as that defines whether a designation is a Staff or Non-staff. Staff members are "People" (that is, not organizations). Non-staff contacts/designations [ministries] must be Organizations.

|
4.Enter the Name information.

•Your ministry should have a standard for how names and addresses are entered. •If the contact is a single person (whether they are married or not), enter all of their information in the first column of boxes. •If they are married, put the husband's name in the first column and the wife's name in the second column. (Although the software will work either way, as a best practice it is better to be consistent with names in the database.) •If the wife has a different last name, uncheck the "Same Last Name" box and a last name box will appear for her. •Title can be a common title such as "Mr." "Mrs." (or one relevant to the language/culture) as well as honorary titles such as Pastor, Rev., Dr., or a military rank such as CAPT, GEN., etc. •Suffix can be a name or a title. For example, it could be Jr, Sr, II, III, , or it could be a title such as Ph.D., JD, or a military designation. etc. |
5.Enter the address, phone, and email
The default address and phone are for the Home, but you can also choose Business or Other. If the contact is an organization, the default address is Business.
•Although the box says "Phone", it actually is a specific phone number, such as Home Phone, Business Phone, or Other Phone. Read More > Phone Numbers
•Enter an email address, if known. Read More > Email Addresses
|
6.Press the <OK> button.
Editing an individual entry in the address or phone
Double-click in any of the six boxes to edit just that item.

Other Name/Address Options
These two buttons allow for customization of individual names or addresses as they would appear on envelopes or in letters. In general you should not need to customize either greetings or mailing addresses.

|
Update the Greetings if you want to manually create a greeting for this contact.
Read More > Greetings
|

|
Update the Address Block if you need a unique address by pressing the button (this would be very rare). One example of when you may want to do this is if you want to include special information in the mailing address block.
Read More > Address Block
|
Tip: You can change the default entry order of either the name and/or the address on the options menu.
Read More > Contact Tab