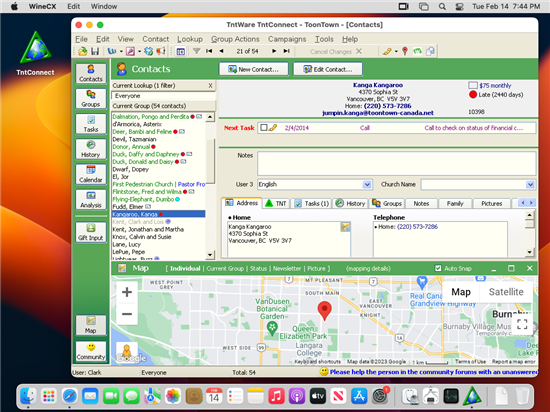
How can I run TntConnect on my Mac for free via Wineskin?
1) Download the Wineskin app (download Wineskin).
2) Download TntConnect 4.0.43 or newer: https://www.tntware.com/tntconnect/downloads/
3) In your Downloads folder, double-click on the Wineskin downloaded app to extract it.

4) Right-click on the "Wineskin Winery" app and click "Open".

5) Click on the "Open" button.

Note: If you see this prompt instead, click Cancel and go back to Step 4 and follow the instructions more closely.

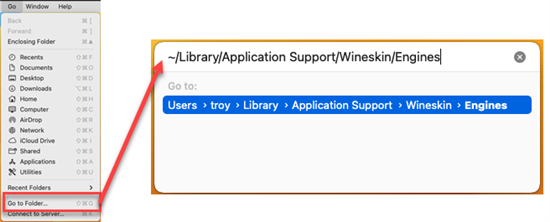
6) In Finder, under the "Go" menu, and click "Go to Folder" to go to:
| ~/Library/Application Support/Wineskin/Engines |
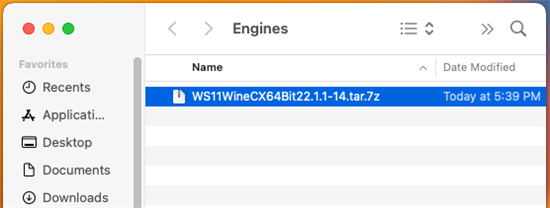
7) Download this file (download "WS11WineCX64Bit22.1.1-14.tar.7z") and copy it into the Engines folder.
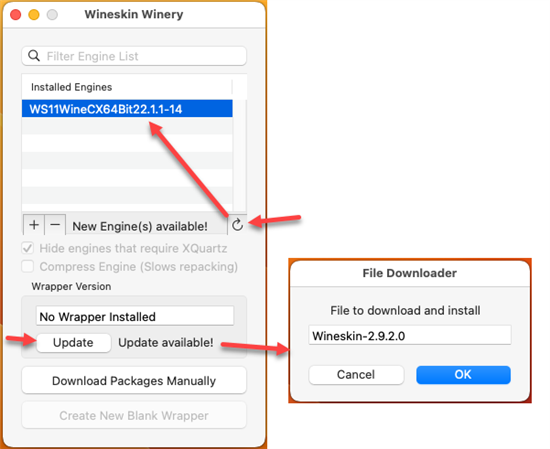
8) Click on the Refresh button to refresh the list of installed engines,
and then click the "Update" button to update the Wrapper and then click "OK" to confirm.
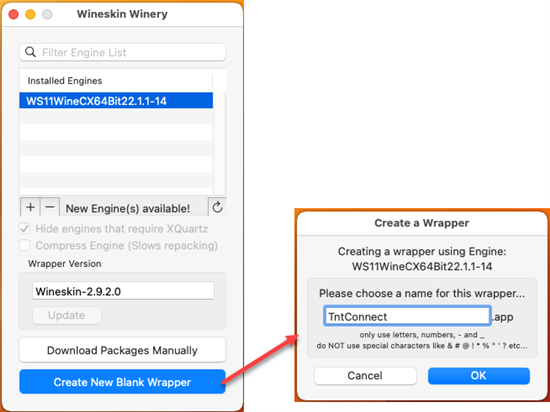
9) Click the "Create New Blank Wrapper" button. Then name the wrapper "TntConnect" and click "OK". Note: this process copies alot of files and takes a few minutes.
10) If you're prompted to install Wine Mono, click "Cancel". (It really doesn't matter if you install it or not.)

11) When it's done, click the "View wrapper in Finder".

12) Drag the TntConnect app somewhere else, like your desktop, so it's easy to find later.

Note: If you forget to do drag TntConnect onto your desktop, here's how you find it later: In Finder you'd [Go | Home], then go into your personal "Applications" folder and then in the "Wineskin" folder.)
13) Double-click on your new TntConnect app, and then click "Install Software".

14) Click on "Choose Setup Executable".

15) When prompted for a file, in your Downloads folder, choose SetupTntConnect.exe (the one you downloaded in Step 2) and then click "Choose".

16) Whenever prompted to allow access to a folder by Wineskin or TntConnect, ALWAYS CLICK OK! :) If you don't click OK, you'll waste time digging through the settings later so as to grant the application the necessary permissions.

17) Follow all the prompts to install TntConnect.

18) After TntConnect is installed, you should be prompted to choose the main executable. Select "C:\ProgramData\__\TntConnect.exe". If should be selected by default. Then click "OK".

19) Finally, click "Quit".

20) If you moved the TntConnect app to your desktop in Step 12, you should now have an icon on your desktop for TntConnect! You can just double-click on it to run it.
(Note: The icon might still appear as the Wineskin icon. It will eventually turn into the green triangle icon.)
