Paso a paso: Configurar un grupo guardado nuevo
En este ejemplo, crearemos un grupo guardado llamado "Amigos con Superpoderes" que identifica a todos los miembros de nuestra base de datos ToonTown que tienen superpoderes especiales.
1.Haz clic en el <Grupos> botón.

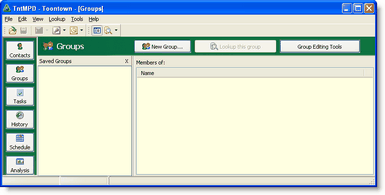
2.Debido a que éste es el primer grupo, toda la pantalla de Grupos estará en blanco:

3.Haz clic en el <Nuevo grupo> botón.

4.Enter a name for your group. You can leave Category blank for now, and add a Category later.
Categories allow you to group related groups together. You can select an entire category when using Lookups to lookup all members of all Saved Groups in a category.

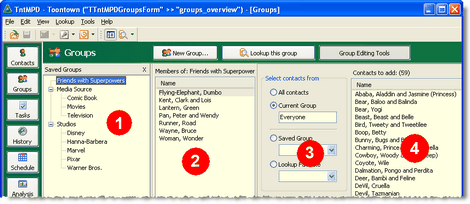
5.You will now see the full Groups View, which has three panels.
Panel 1
|
List of all Saved Groups
|
Panel 2
|
Members of the selected Saved Group
|
Panel 3
|
What to compare the selected Saved Group to
|
Panel 4
|
Contacts from the comparison list
|

6.Show or hide the group editing tools.

|
Turns off the editing tools.
|
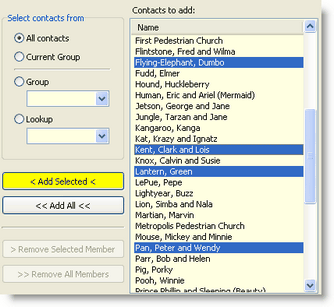
7.Select all of your ministry partners one at a time on the list. You can use the buttons, or double-click on the names.

|
Moves the selected contacts into the Saved Group.
|

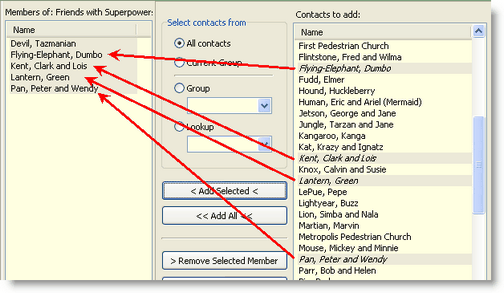
8.Nota que los contactos a la derecha han sido puestos en color gris y en cursiva. Esto indica que dichos contactos ya se encuentran en el grupo.

9.Try this: Compare your group to another group. Press the <All contacts> radio button. You will notice that members of that group (all contacts) who are not in the Saved Group are normal text, while contacts who are already in the Saved Group are italicized.

10.Lookup this group.

|
Makes this Saved Group into the Current Group, and shows you the Contact View.
|
11.Finally, you can view which groups any contact is a member of by clicking on the Groups tab in the Contact View.
