This topic is available on video!
View > Video: Creating a new Donation batch
Creating a new Donation batch
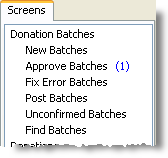
1.Select the <New Batches> link.

If any of the items in the Donation Batches list has a number next to it, that indicates the number of pending items in that category.
After selecting this list, you will see a list of all batches (if any) currently in progress.

2.Press the <New Batch> button.

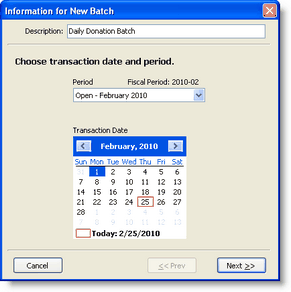
3.Fill out the required information for the Batch Header.

Description
|
Enter a Description for the batch – one that describes the kind of batch or that helps to identify it from other batches. A description like “Batch” will not do this.
|
Period
|
Enter the Period in which the batch should be posted. For the first batch, DonorWise will default to the period that is closest to the current date, after that, it will default to the period of the last batch that was entered.
|
Transaction Date
|
Enter the Transaction Date. The date should coincide with the batch period. The transaction date will become the default date for the first item that is entered. Each subsequent row will have as a default date the date of the row above it.
NOTE: The calendar will only display dates up to the current day. While DonorWise will allow you to assign batches to a future PERIOD, it will not allow you to assign it to a future DATE.
|
4.Press the <Next> button.
5.Enter the totals per payment type.

If you use multiple currencies in your DonorWise (very rare), you will also be able to select the currency amount for each payment type, and can have the same payment type multiple times, once for each currency.
6.Press the <OK> button.
7.Enter the items in the batch.
Read More > Entering a Donation
8.Once the total of the items equals the totals amounts entered in the Header, the "Mark Complete" button will be available for you to complete the batch.
9.Press the <Mark Complete> button.

10.The batch will now move to the "Approve Batches" list.
Note: Completed batches are still editable. They cannot be edited after they are approved.
Read More
Read More > Reverse/Correct/Refund
View > Video: Reverse-Correct-Refund Overview